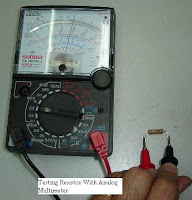
Instructions
Step 1:
Set the multimeter dial to the unit you want to measure. Voltage is marked by a V, amperage by an A and resistance by an Ω, called an omega.
Step 2:
Set the dial to the maximum value you want to measure. Usually, the values differ from each other by a factor of 10. For example, 10 ohms, 100 ohms and 1k ohms for resistance. The letter k stands for kilo meaning thousand. The letter m stands for milli, meaning thousandth. If you do not know what value to use, use the very highest to minimize the risk of damaging your multimeter.
Step 3:
If you are measuring resistance, turn the circuit off and unplug it. Otherwise, power it on.
Step 4:
Touch the probes to the two points you wish to measure the difference between. If you are measuring the resistance of a particular resistor, for example, put one on either side of the resistor. If you are measuring amperage, put the red lead on the positive side and the black one on the negative side of the circuit component you are measuring.
Step 5:
Look at the value on the dial or digital display. If you are using a digital multimeter, it will tell you in exactly the right unit. For example, it will say 10 V if there is a 10 volt drop over the component. With analog multimeters, you read the dial as a value out of 10. If you had it set to 1 volt and the dial read a 5, it would mean 0.5 volts. If it were set to 100 millivolts and the dial read 5, however, it would mean 50 millivolts.
Step 6:
Change the setting if necessary. If the ohmeter registers a value that is less than 1/10th of the total, you should set it down one level lower. For example, if you have it set to 100 Ω and it reads below 10 Ω, you should set it to 10 Ω to get a more precise value.
No comments:
Post a Comment